

My New Nail Girl!
Yesterday was a super fun day for me! Not only did I get to do one of my favorite people’s nails, I also got to do her adorable daughter’s nails too! And not to brag or boast, but I am officially her new nail girl…don’t be too jealous. :)))))
I’ve written about April before who is seriously one of the coolest people ever and I’ve told her to bring Grace, her 10 year old (almost 11!) daughter with her but it’s just never worked out in the past. This time however, Grace and April are heading out of town for Easter and Grace wanted her nails done so our first nail appointment worked out perfectly! 🙂
Grace is this amazing little girl who is so smart beyond her years and is full of amazing talents! She’s got moves on the dance floor, the tennis courts, and she’s also a cheerleader! I know I’m forgetting a long list of other talents too! I predict she is going to make a huge impact on this world…just like her momma!
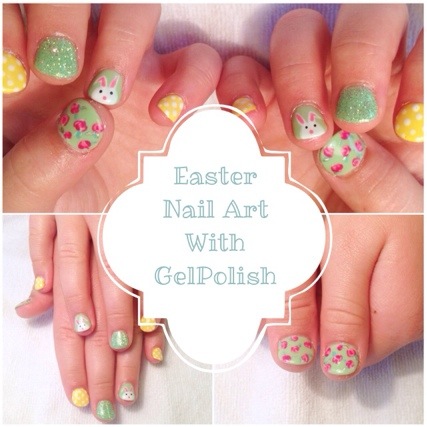
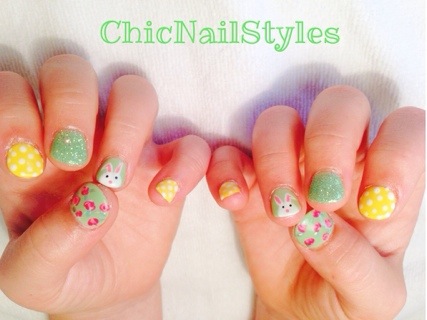
And check out these fun Easter nails she pretty much came up with all on her own!
I seriously love how these turned out! I know I say that a lot but I just can’t get over how cute these are!
I used all kinds of OPI GelColor polishes for this mani but Grace was super excited about the mint green theme…which I think is just perfect for Easter!
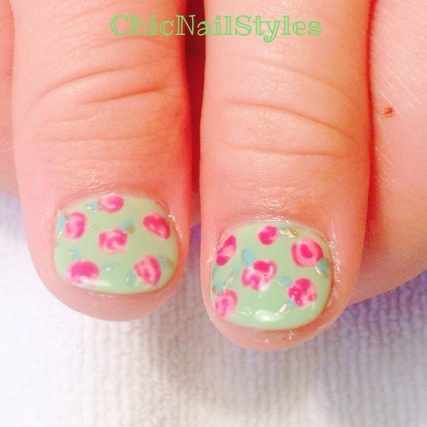
This floral pattern on the thumbs reminds me of a pretty Easter dress 🙂
The Grace Easter Mani–Products and Steps
Products Used:
Mint Gel Polish
OPI Gel Nail Color, Gargantuan Green Grape, .5 Ounce
Yellow Gel Polish
OPI Gel Nail Color, I Just Can’t Cope Acabana, .5 Ounce
Light Pink Gel Polish For Bunny and Flowers
OPI Gel Nail Color, Short Story, .5 Ounce
Dark Pink Gel Polish For Flowers
GelColor by OPI Soak-Off Gel Laquer nail polish – Pink Flamenco – GC E44
White Gel Polish
O.P.I Gelcolor Collection Nail Gel Lacquer, Alpine Snow, 0.5 Fluid Ounce
Dark Green/Turquoise Gel Polish For Leaves
Young Nails Color Mani Q Nail Polish, Emerald 101, 0.5 Fluid Ounce
Gold Nail Polish For Leaf Detail
Essie Mirror Metallic Collection Summer 2012, Good As Gold
Step by Step:
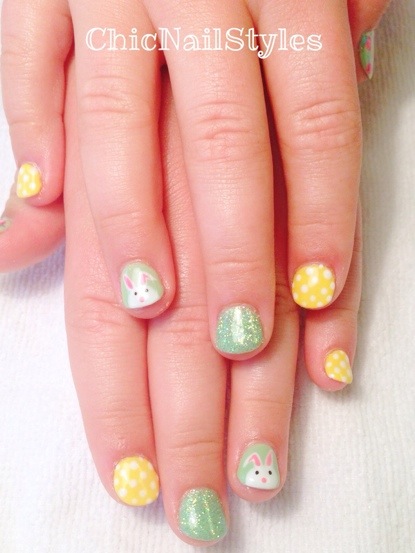
Pinky and Index Finger
Do three coats of yellow gel polish, cure thoroughly, and apply small white polka dots with white gel polish and a small dotting tool. Make sure to only use a tiny amount of white gel polish or else the dots will slide into the cuticle. You can flash cure your polka dots to avoid sliding. To get perfect polka dots, pretend you are drawing diagonal lines across the nail bed and line your dots up evenly spaced along these imaginary lines. Click here for a great polka dot tutorial.
Middle Finger
Apply three coats mint gel polish and cure thoroughly. Sprinkle mint glitter on entire nail bed, wipe off excess glitter along skin, and press glitter down with fingertip. Apply two light top coats over glitter, curing thoroughly.
Ring Finger
Apply three coats mint gel polish and cure thoroughly. Use white gel polish and draw bunny head and ears lightly with a thin art brush and cure for two minutes. Do one more thin coat of white to fill in bunny and cure again. Use light pink gel polish and draw bunny ear details with a tiny, thin art brush and nose with a tiny dotting tool and cure. Use black acrylic paint and dot on eyes. Make sure acrylic paint is totally dry and apply two top coats, curing for two minutes each time.
Thumb
Apply three coats mint gel polish. Use white gel polish and thin art brush and apply flower blobs in a random pattern on thumb. Cure. Apply swirls of light pink gel polish on the white flowers, making it look like petals. Cure. Apply highlight details with dark pink gel polish over the light pink, just to add shadows and dimension. Cure. Draw leaves with dark green/turquoise gel polish, cure, and add a gold polish highlight on leaves letting dry completely. Apply two top coats, curing thoroughly each time. Click here for a great vintage floral nail tutorial. It’s a little bit different than my technique but it’s actually easier and I think super cute. 🙂
So there ya have it! Now you can get “The Grace Easter Mani” and be as adorable as can be! 🙂 I hope everyone has an amazing Easter weekend or just a great weekend if you don’t celebrate Easter! It’s such a beautiful time of year and I am so grateful to be able to spend it the loves of my life in such a beautiful world! 🙂
Thank you so much for reading!
Tootles–Anna